How to create additional WCP login accounts
Creating Additional WCP Logins
WCP stands for Windows Control Panel and controls domains, reseller accounts, VPS accounts, etc. that integrates with IIS (Microsoft Internet Information Service).
Often times you may have a developer or someone within your company / organization that may need to access something within the control panel for one of your domains. We do not recommend that you provide anyone with your main account login credentials, so for that very reason we created a feature that allows you the ability to create and manage additional control panel logins for WCP and control the features that they have access to upon logging in.
Below are the steps needed in creating additional control panel users for WCP:
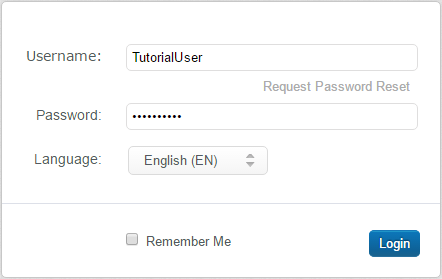
1. Login to the WCP control panel with the main WCP account (Billing Account Credentials): https://wcp.hostek.com
- If needed see our guide on logging into WCP: How_to_login_to_WCP
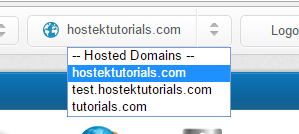
2. Once logged in, if you have more than one domain make sure that your in the control panel for the correct domain by selecting the domain drop-down in the top-right of the control panel as shown in the screenshot below:
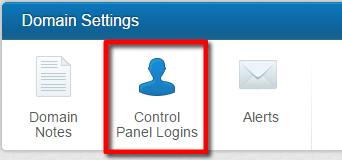
3. In your control panel click on the Control Panel Logins icon under the Domain Settings section.
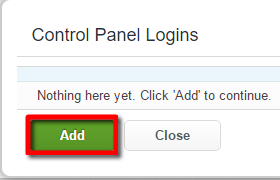
4. Click on the Add button to add a new login.
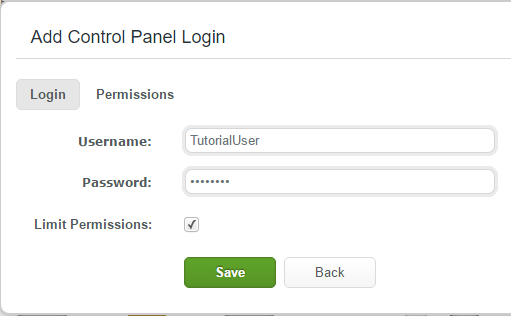
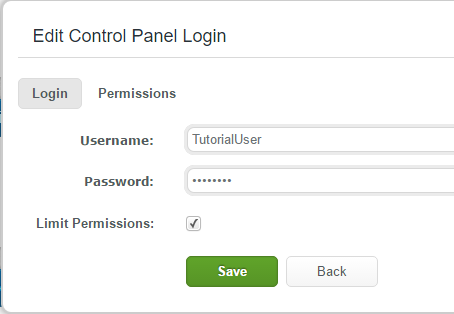
5. You will now be asked to enter the username and the password that will be used to login to the control panel. Additionally if you want to limit the permissions this user has access to for the domain then check the checkbox for Limit Permissions. Once checked the tab for Permissions will be available to navigate to.
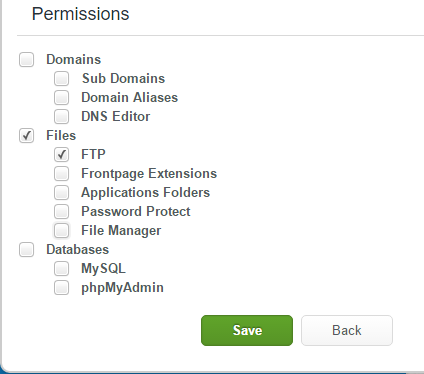
6. In this permissions tab you can select and de-select the checkboxes for what you want and do not want the user to have access to.
Example: If you have a developer that only needs FTP access you can deselect all the categories except for Files > FTP as shown in the screenshot below:
7. Click Save to add this new user and it’s permissions. Now you can logout and attempt to login back in with the new user.
- As shown in the screenshot below the user only has access to the FTP Accounts option in the control panel:
Update Existing User
The above section goes over adding a new user. If you have an existing additional control panel user then you can follow the below steps to update the user(s).
1. In your control panel click on the Control Panel Logins icon under the Domain Settings section.
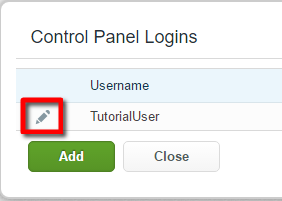
2. Click the pencil icon next to the user you wish to update.
3. Now you should see the ability to update the existing users password. You can also change the status of the users permissions by either enabling / disabling permissions with the checkbox or by going to the Permissions tab and selecting the permissions you wish to be set for the user. Note: You can not change the username for the control panel login here. If you need to change it’s name you’ll have to delete the user with the trash can icon and then re-add the user.
4. Click on Save to save any of the changes you’ve made to the control panel login user.
