IIS Password Protect
Contents
Manage Password Protect ( WCP )
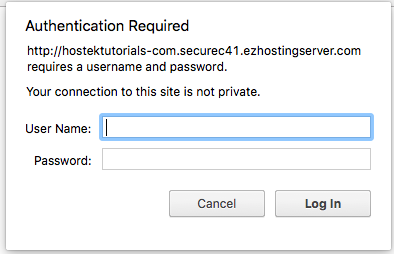
The 'Password Protect' feature we provide with the WCP control panel can be quite useful, especially if you want to restrict a specific folder or folders to only be accessible by a couple of people with a username and password.
This 'password protect' feature is not using the licensed version on any of our windows servers by default, so the max amount of users you can add per domain for this feature is 3 due to the non-licensed version. If you need more than 3 users then you may look into an alternative authentication measure to put in place in your sites code (web.config, .htacess, etc.).
Let's go ahead and show how to manage this 'password protect' feature by using the custom built WCP control panel.
How to access 'Password Protect’ in WCP
We'll share the steps needed in order to navigate to password protect in your WCP below:
First login to your WCP control panel for the account the domain is under: https://wcp.hostek.com
If you have any issues with logging into WCP then please see our tutorials on recovering your password if necessary
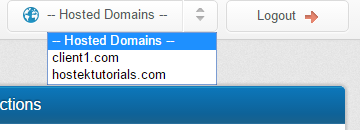
Once logged into WCP if you have multiple domains you may need to select the appropriate domain to manage using the 'Hosted Domains' drop-down in the top-right of the page as shown in the screenshot below:
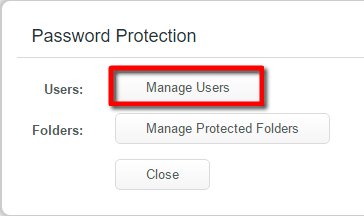
Once in the correct domains WCP control panel click on the 'Password Protect' icon under the 'Files' section.
Manage password protect users
As we mentioned in the introduction to this 'password protect' feature we mentioned this feature is by default limited to 3 users, so be sure that you create the users your site is needed. You can delete and create users provided by the steps below:
Create a new user
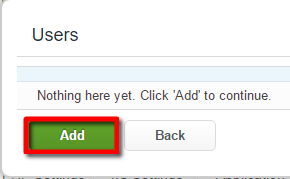
We provided the steps to get to the 'password protect' feature in the above section. Now let's show the steps to create a new user below:
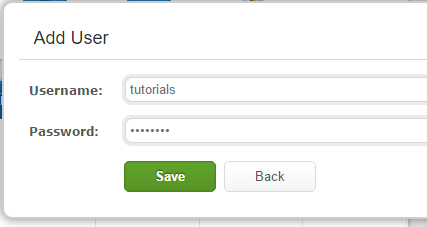
You will now be presented with a form asking for the username and password for this user. This user/pass combo will be used to login to any password protected folder this user is assigned to.
Enter in the desired username and password and then click the 'Save' button.
Edit existing users password
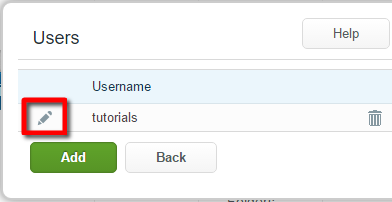
Sometimes you may forget a password you had set for a user, we'll go ahead and show you how to reset the password for a password-protected user below:
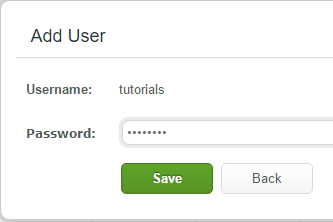
You will then be able to change the password and click 'Save'. You'll note you cannot change the username. To change the username you must delete the user and then re-create with a new name.
Delete existing user
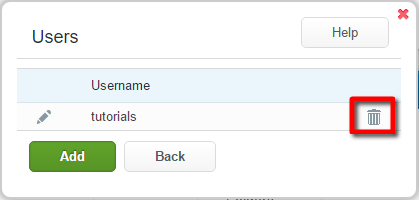
Sometimes you don't need a user anylonger, or perhaps you'd just like to make room for another user by removing an existing one. Let's show below how you can delete an existing user:
- Click the trash can icon next to the desired user you wish to delete as shown in the screenshot below:
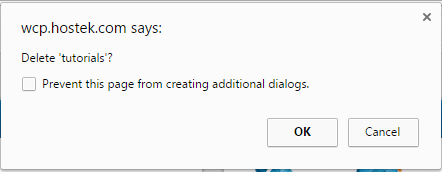
- You will then be presented with a confirmation pop-up asking if you're sure you wish to delete the user as shown in the screenshot below. Click 'OK' to confirm the deletion or click 'Cancel' to cancel the deletion.
Password Protect Folders
We learned in the above sections how to manage password protected users.. so let's not show how to use them to password protect a directory:
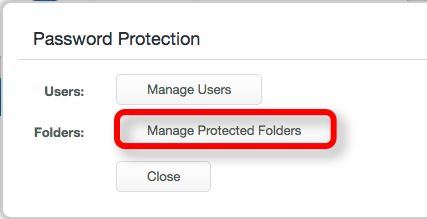
- In the 'Password Protect' feature click on 'Password Protected Folders' as shown in the screenshot below:
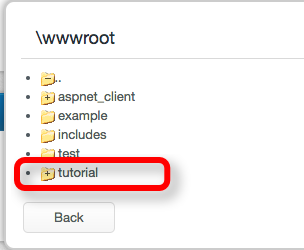
- You should now see a list of folders that are present on your site. Your websites ROOT directory is by default the wwwroot folder, so it should display a list of possible folders to password protect under the wwwroot directory. If a folder has multiple levels then you can click the '+' icon on the folder to expand it and view it's listed sub-folders. Click on the name of the folder you wish to password protect as shown in the screenshot below:
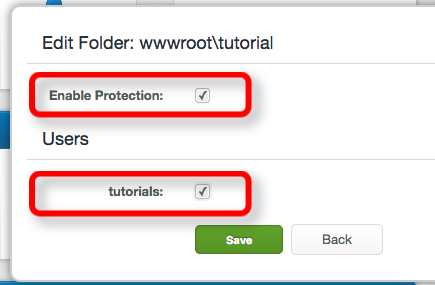
- You will now see a checkbox next to 'Enable Protection'. Check this box and you'll then be able to choose from your existing list of users for which users will have access to this folder.
- Click on the 'Save' button in order to save the changes to the folders protection.
Note: If you ever need to remove the protection then follow the same steps above and uncheck the box for 'Enable Protection'. Additionally if you just need to edit the users that have access you can follow the same steps above and adjust the users checkboxes accordingly.
