Difference between revisions of "WCP File Manager"
(Created page with "__TOC__ <p style="font-size: 1.5em; border-bottom: 1px solid #aaa;">FileManager in WCP</p> WCP is our own custom built windows control panel. This control panel has a large...") |
(No difference)
|
Revision as of 18:01, 16 April 2017
Contents
- 1 Logging in to FileManager
- 2 Navigating through File Manager
- 3 Selecting multiple files / folders
- 4 Creating a File
- 5 Uploading a File
- 6 Creating a Directory
- 7 Editing Existing File
- 8 Rename a File or Folder
- 9 Copy a File or Folder
- 10 Move a File or Folder
- 11 Delete a File or Folder
- 12 Compressed Files
- 13 Downloading Files
FileManager in WCP
WCP is our own custom built windows control panel. This control panel has a large list of amazing features, which one of these features is an easy-to-use file manager for making quick updates to your site files.
We'd like to note that more intensive updates to the site may either require or be faster to use FTP to upload or manage the site, so if needed please view our tutorial on [FTP Accounts in your WCP control panel].
This file manager feature has a lot of capabilities that we'll explain in this tutorial below.
Logging in to FileManager
Before we begin to show how to use FileManager let's first show how to get to this 'File Manager' section.
1. First login to your WCP control panel for the account the domain is under: https://wcp.hostek.com
- If needed see our guide on logging into WCP.
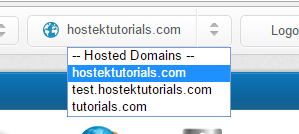
2. Once logged into WCP if you have multiple domains you may need to select the appropriate domain to manage using the 'Hosted Domains' drop-down in the top-right of the page as shown in the screenshot below:
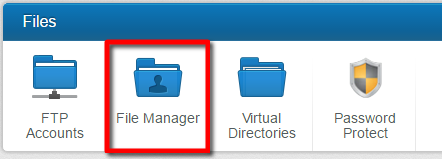
3. Once in the correct domains WCP control panel click on the 'File Manager' icon under the 'Files' section.
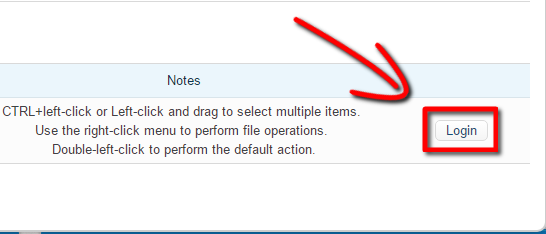
4. You should now see a description of the FileManager along with a login button to login to FileManager. Go ahead and click this 'Login' button.
You should now be logged into the File Manager, so you can make any edits or changes that is necessary. Check out the other sections for a step-by-step on some of the features provided within this File Manager.
Navigating your way through File Manager is very easy. You can navigate into folders two different ways, which we'll show you, as well as you can go back a single folder or even go back multiple folders depending on what you're needing.
To navigate into a folder you have two options. The first option you have is to just single-left click on the folder you wish to navigate into as shown in the screenshot below.
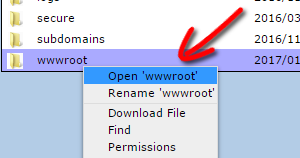
You can also right click on the folder you wish to open and then choose the option for 'open folder', where 'folder' is the actual name of the folder as shown in the screenshot below.
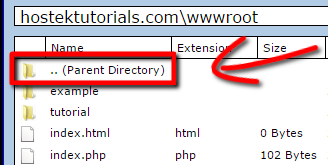
To navigate back a folder you have two options. The first option will take you back a single folder, so for example if you are under /hostektutorials.com/wwwroot/example it'd take you back to /hostektutorials.com/wwwroot/. To do this click on the '.. (Parent Directory)' option from the folder structure menu as shown below.
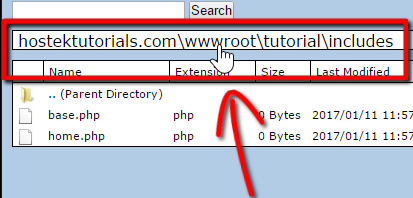
Another option to navigate back to a previous folder might be the most commonly used as it allows you to navigate back multiple folders at a time instead of just going back one directory at a time. To do this click on the folder from the breadcrumb menu that you want to navigate back into as shown in the screenshot below:
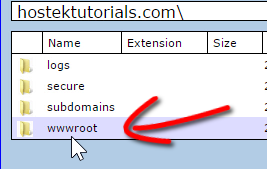
Example below: The below screenshot shows we're under the "/hostektutorials.com/wwwroot/tutorial/includes" directory and by clicking the 'wwwroot' directory we can navigate back to "/hostektutorials.com/wwwroot/" a lot easier.
Selecting multiple files / folders
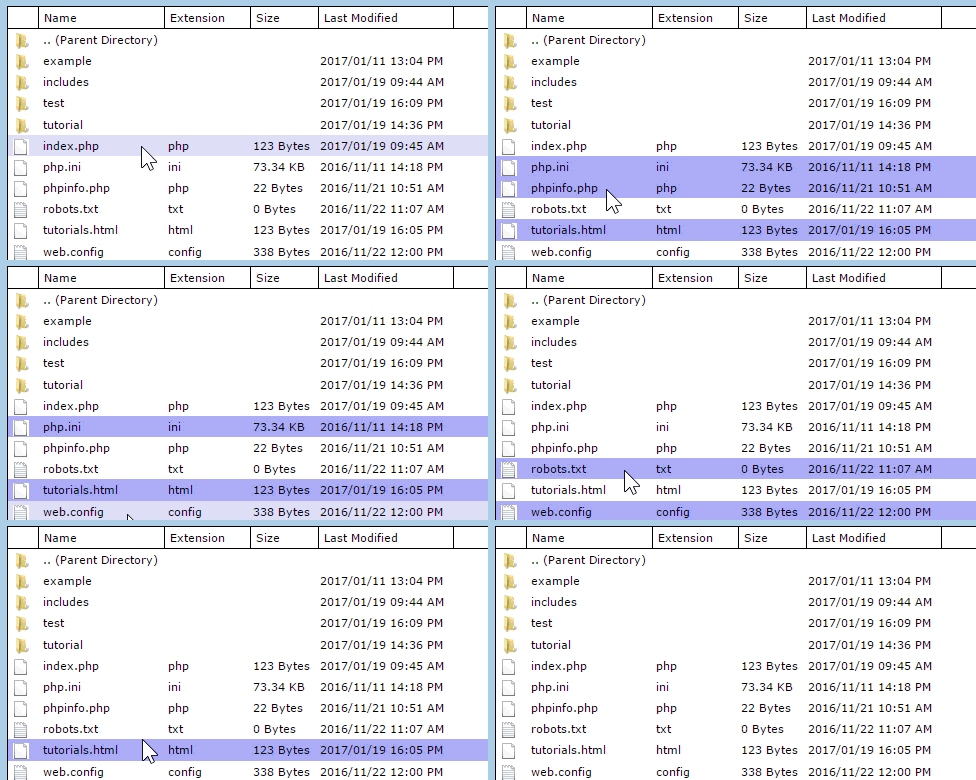
To select multiple files / folder at the same time ( in order to copy / move / download / etc. ) follow the steps below:
Drag & Select
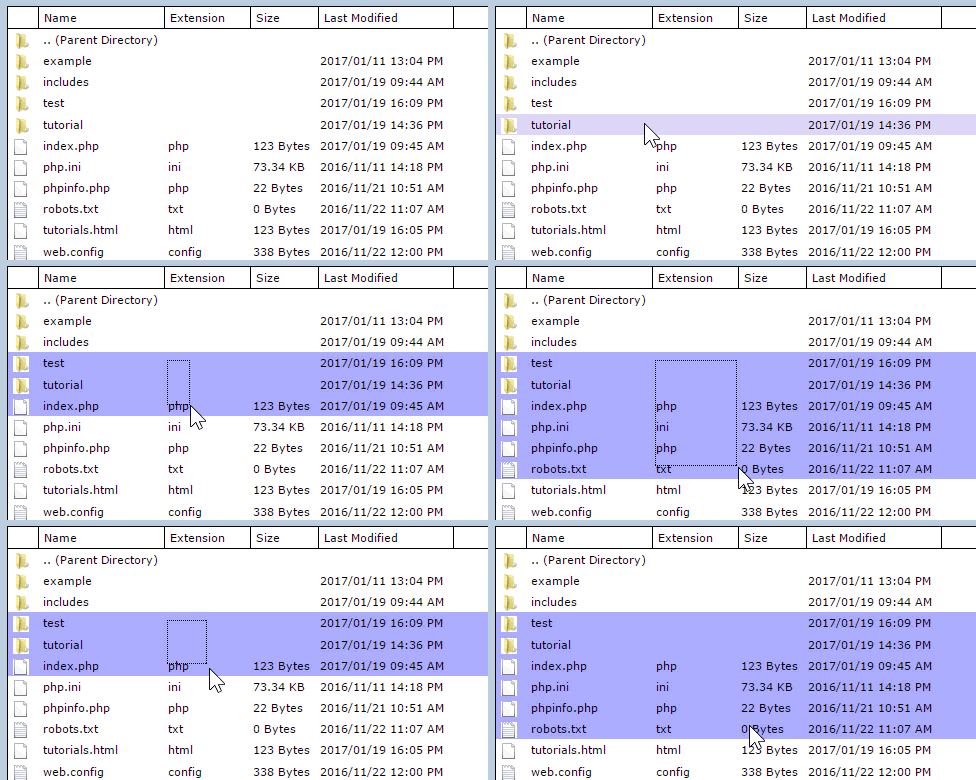
First navigate to the folder you wish to select files and / or folders from and then left-click and drag your mouse ( while holding the click ) to choose the files and folders you wish to select as shown in the GIF image below:
Click & Select
First navigate to the folder you wish to select files and / or folders from and then hold down your CTRL key on your keyboard and then left-click the files you want to select as shown in the GIF image below:
Creating a File
Sometimes you need to create a new file on the fly. The file manager allows you to do just that. See below:
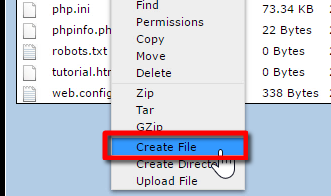
1. To create a new file just right click in the folder structure view (Where all the files / folders are) and choose the option for 'Create File' as shown in the image below:
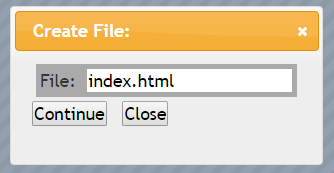
2. You will then be presented with a form asking what you wish to name the file as showing the screenshot below. Enter your desired file name and then click the 'Continue' button.
That's it! The new file should now be present in your folder / file structure.
Uploading a File
Uploading an existing file from your local computer is an easy process which we'll show below:
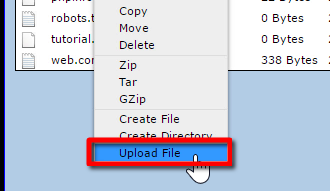
1. To upload a file just right click in the folder structure view (Where all the files / folder are) and choose the option for 'Upload File' as shown in the image below:
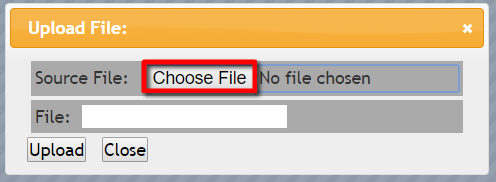
2. You will then be presented with a form asking for you to browse and select the file on your local computer. Click the 'Choose File' button to open a explorer window on your local computer that you'll use to locate the file you wish to upload.
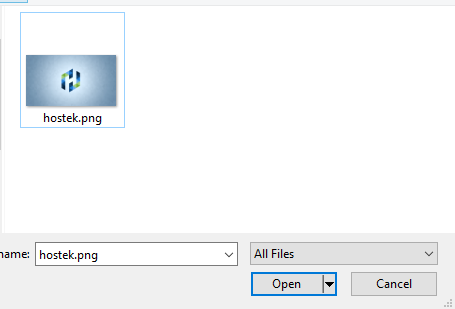
3. After selecting this 'Choose File' button a popup showing your local computers file system should appear. Use this window to locate and select the file you wish to upload and choose to 'open' or 'select' that file.
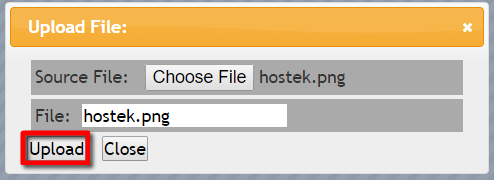
4. You will now see in the Filemanager that you've selected the desired file to upload and you will now have the option to re-name the file before uploading ( This doesn't rename the file on your local computer ). Once you're satisfied with the file you're uploading and the name of the file click the 'Upload' button.
That's it! You're done as the file should now be uploaded. You will need to complete this same process for any additional files you wish to upload or you'll need to create / use an FTP application to upload.
Creating a Directory
Sometimes you need to create a new directory on the fly. The file manager allows you to do just that. See below:
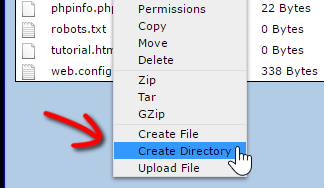
1. To create a new folder just right click in the folder structure view (Where all the files / folders are) and choose the option for 'Create Folder' as shown in the image below:
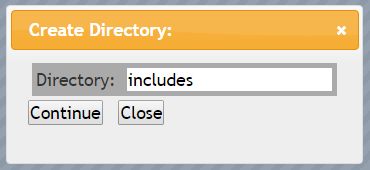
2. You will then be presented with a form asking what you wish to name the folder as showing the screenshot below. Enter your desired folder name and then click the 'Continue' button.
That's it! The new folder should now be present in your folder / file structure.
Editing Existing File
If you need to make an edit to just a couple files then the FileManager may be a good quick solution for you as we make it very simple to perform these edits. See below on how to edit an existing file:
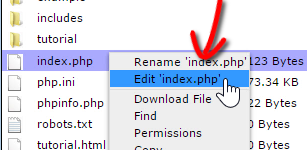
1. To edit an existing file locate the file in your file manager you wish to edit and right click that file and choose 'Edit File', where 'File' would be the actual name of the file you selected. See screenshot below:
- Note: You can also double click on the desired file to edit.
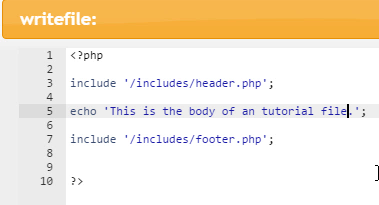
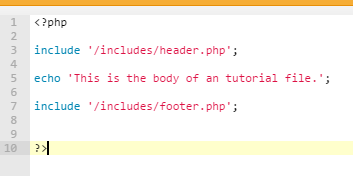
2. You will now be presented with an editor screen showing the existing code / content within that file that you are editing as shown in the screenshot below.
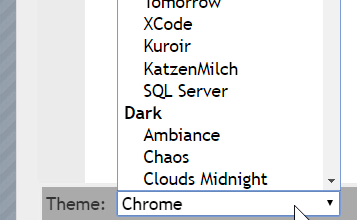
- The editor as you can see in the screenshot above has colored syntax to make it easier to read. You can also change the theme, which will update the background and the colors of the code based on the theme you chose. To change the theme click on the drop-down next to 'Theme' and choose from the list of available themes.
- In the below screenshot you can see what it looks like for example when we changed the theme to 'Github':
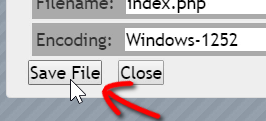
3. Once you are done making changes to your code click the 'Save File' button on the bottom-left section of the editor.
Your edits to the file should now be saved!
Rename a File or Folder
There are times you may need to rename an existing file or directory on your site(s). We'll show you how to do this below:
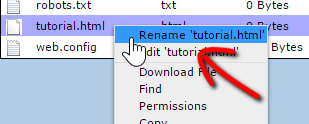
1. First locate within the File Manager the file or folder which you wish to update. Right click this file / folder and choose the option for 'Rename File/Folder', where File/Folder would be the name of the file / folder that you're renaming.
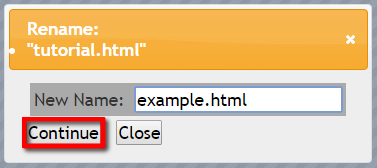
2. You will then be presented with a form asking what you wish to rename the existing file/folder to as showed in the screenshot below. Enter your desired file/folder name and then click the 'Continue' button.
The file/folder should show up in the FileManager now with the new name you have updated it to.
Copy a File or Folder
The copy & move functions are very similar. The copy function will leave the file in the existing directory as well as place a copy in the destination directory. The move function will remove the file from the existing directory and place it in the destination directory.
Let's show you how to copy a file/folder to another directory:
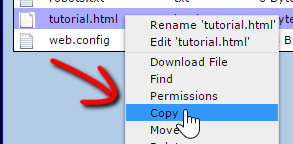
1. First locate within the File Manager the file or folder which you wish to copy to another directory. Right click this file / folder and choose 'Copy' as shown in the screenshot below.
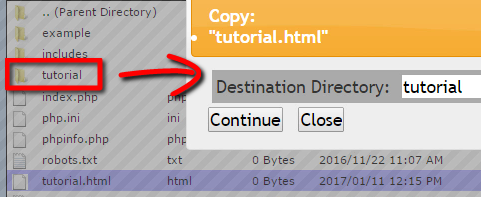
2. You will then be presented with a form asking what directory you wish to copy the file into. This directory has to be a folder underneath the existing directory you are in. If you're needing to move the file / folder above the current directory you may want to use FTP instead of the File Manager.
Enter in the desired directory you wish to copy this into. Remember the folder must exist and be beneath the currently open directory.
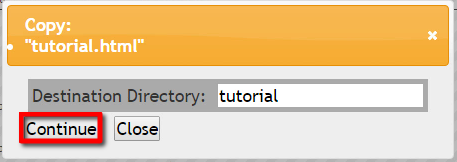
3. Click the 'Continue' button once you're satisfied with the directory name you've entered.
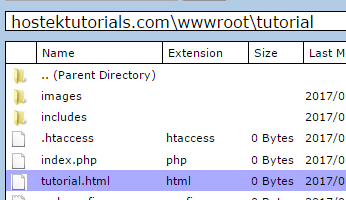
The file / folder should now be copied into the desired directory successfully as shown in the screenshot below:
Move a File or Folder
The copy & move functions are very similar. The copy function will leave the file in the existing directory as well as place a copy in the destination directory. The move function will remove the file from the existing directory and place it in the destination directory.
Let's show you how to move a file/folder to another directory:
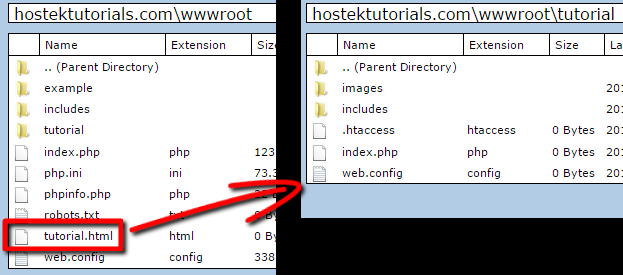
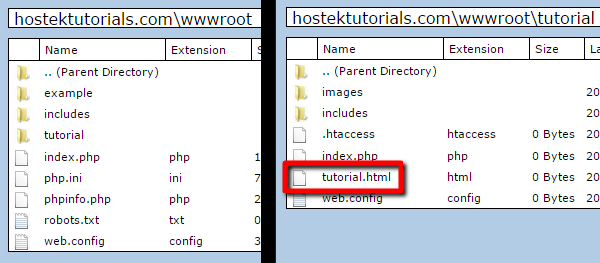
For this example we'll be moving a file named tutorial.html from the /hostektutorials.com/wwwroot folder to the /hostektutorials.com/wwwroot/tutorial/ directory.
Example image below of what we'll be trying to accomplish:
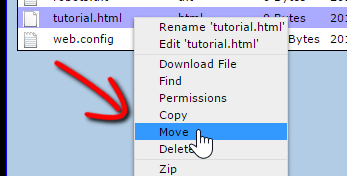
1. First locate within the File Manager the file or folder which you wish to move to another directory. Right click this file / folder and choose ‘Move’ as shown in the screenshot below.
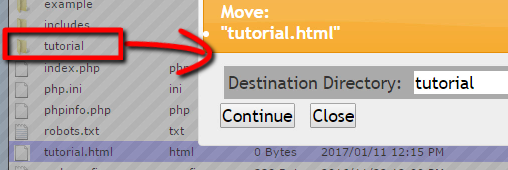
2. You will then be presented with a form asking what directory you wish to move the file / folder into. This directory has to be a folder underneath the existing directory you are in. If you're needing to move the file / folder above the current directory you may want to use FTP instead of the File Manager.
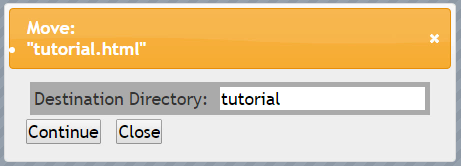
Enter in the desired directory you wish to copy this into. Remember the folder must exist and be beneath the currently open directory. We'll use 'tutorial' for this example as shown in the screenshot below.
3. Click the 'Continue' button once you're satisfied with the directory name you've entered.
The file / folder should now be removed from the existing directory and instead be located in the directory you specified as shown in the final screenshot below:
Delete a File or Folder
Occasionally you may need to remove a file / folder from your sites folder structure. We'll show how you can accomplish this easy task below:
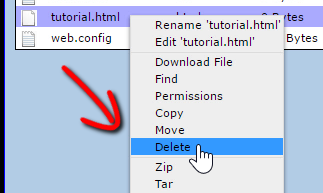
1. First locate within the File Manager the file or folder which you wish to delete. Right click this file / folder and choose ‘Delete’ as shown in the screenshot below.
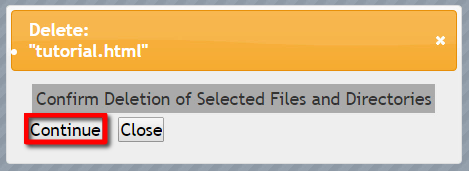
2. You will then be presented with a confirmation request to delete the file / folder. If you do wish to delete the file / folder click the 'Continue' button. If you do not wish to delete the file click the 'Close' button or the x on the top-right of the confirmation box.
Compressed Files
Sometimes you'd like to compress all the files on your site or a specific folder so that you can easily down a single file containing all those files / folders. Within the File Manager we enable three different compression types that you can use (Zip, Tar, & GZip).
Let's show how to compress a folder:
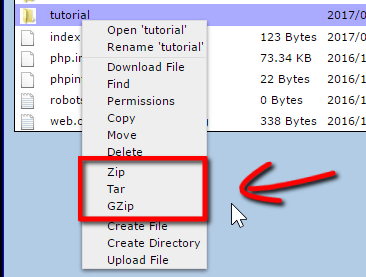
1. First locate the folder you wish to compress. Right click on the folder and choose one of the following options:
- Zip
- Tar
- GZip
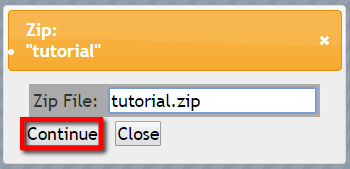
2. You will then be presented with a form asking you to name the new compressed file. Enter the newly desired name for the new compressed file.
Note: You can leave off the .zip , .tar, .tar.gz at the end of the file name as it will append it automatically if you do not enter it during the naming process.
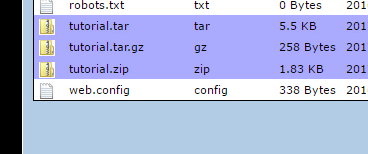
You should now see the compressed file(s) under the same directory as shown in the below screenshot ( Screenshot shows what each will look like ).
Downloading Files
There are times where you want to download a file to your own local computer, whether it be just to open it up in your own editor or to store the file for safe keeping. We'll show how you can easily download file(s).
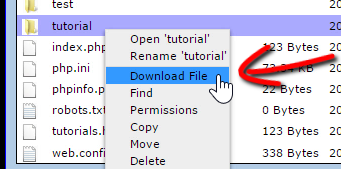
1. Locate the folder / files you wish to download and then right click and choose the option for 'Download'.
- Note: If you choose more than 1 file or you choose a directory to download then it will automatically compress the files and / or directory in a .zip format and then it will download to your local computer.
