Manage Name Servers
From Hostek.com Wiki
Manage Domain Name Servers
In this tutorial we will show how to manage your domains Name Servers (authoratative name servers ) in your billing control panel.
Login to your account at https://cp.hostek.com
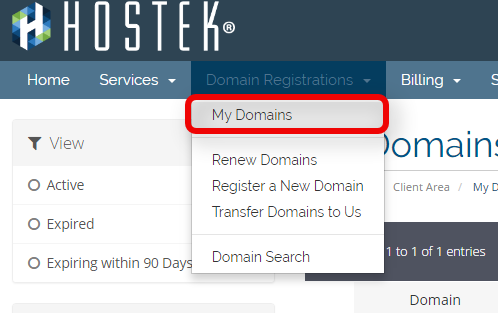
- In the top-navigation menu click on 'Domain Registrations', then click on 'My Domains'.
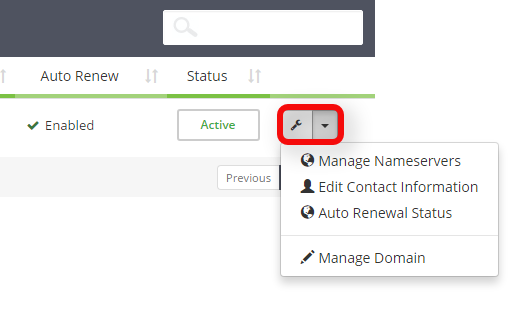
- You should now see a list of your active, cancelled, and expired domains that you've had in your account as shown in the screenshot below:
- To the right of the domain you wish to manage click the wrench icon, or select the drop-down and choose 'Manage Domain'.
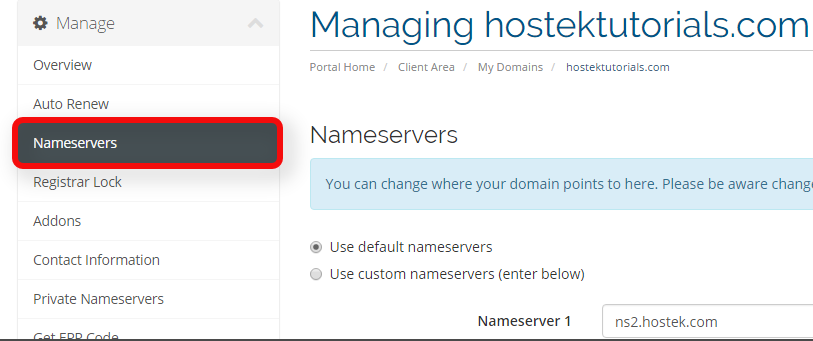
- You will now be in the management portal for the domain in question. You will see a menu bar on the left side of the page with all the available options to manage for a domain. Click on the menu item labeled 'Nameservers'.
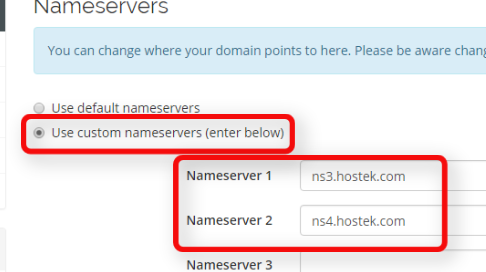
- You can now select the radio button for 'Use custom nameservers (enter below)' and then enter in each name server you wish the domain to point to.
- Once you enter in the new pair of name servers you want the domain to point to and / or select the appropriate radio button then you can save your changes by clicking on 'Save Nameservers' as shown in the screenshot below.
Note: You can also click on 'Manage Nameservers' if desired. If you do so skip to step 6.

Note: If you do not select the 'Use custom nameservers' radio button then when you save your name servers it will default back to the default name servers we have setup.


