Getting Started with a Windows VPS
From Hostek.com Wiki
Contents
Getting Started with your Windows VPS
This article will give you the basics for getting started with your Windows VPS using our control panel.
How To Login To My WCP Control Panel
- To manage your domain, login to the WCP Control Panel, using the details below
- URL: https://wcp.hostek.com/
- Username:
- Password: ** same as your cp.hostek.com password **
- You can also login to the control panel through your billing control panel https://cp.hostek.com/clientarea.php
- Click on 'My Services' 'Click the small Green arrow on the the notepad to the right'
- Now click the Login to Control Panel Icon
Add Domain
- Login to WCP: https://wcp.hostek.com/
- Go to the Server Manager area
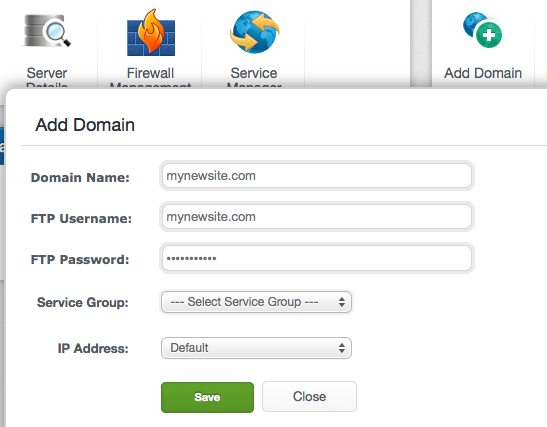
- Click on the Add Domain button
This section allows you to add new VPS domains (Web sites).

After clicking the Add Domain button enter your site's domain name, FTP username & password, then select the service group and IP address if applicable. Once you click Save your new domain will be added to the server.
MySQL database
After adding a domain, you can add a database within the domains control panel.
- MySQL Allow you to create a MySQL database under your domain
- Click on MySQL icon
- To add new database click Add MySQL Database
- Enter Database Name
- Enter Username
- Enter Password
- (If you need a coldfusion DSN place check in check box and provide Coldfusion DSN name)
- Click Save
- To create new user for existing database
- Click MySQL icon
- Click Add new user button
- Enter Username
- Enter Password
- Place check mark in check box for each database you would like this user to have access to.
- To update the password on existing database user.
- Click MySQL icon
- Click pencil icon next to Username
- enter new password
- Click on the Save Icon.
- To update the password on existing database user.
- Click MySQL icon
- Click pencil icon next to Username
- Enter new password
- Click on the Save Icon.
MSSQL
After adding a domain you can add a MSSQL database within it's control panel.
To create MSSQL databases and users
- Click MSSQL icon
- To add a new database click Add MSSQL database
- Enter Database Name
- Choose database size
- Enter or Choose existing Username
- Enter Password
- Choose Default Collation (Usually left as default)
- Choose Recovery Model (Usually left as Simple as we make daily full backups of all #databases which we keep for 7 days for our shared and SQL database addon hosting options)
- Place a Check mark in the box for Coldfusion DataSource if ColdFusion DSN is needed.
- Enter ColdFusion DSN name.
- Click on the Save Icon.
Comprehensive Guide to WCP
Here is a link to the comprehensive guide to our control panel: https://wiki.hostek.com/WCP_(Windows_based_Control_Panel)