Difference between revisions of "MySQL Workbench"
| (5 intermediate revisions by 3 users not shown) | |||
| Line 9: | Line 9: | ||
Before connecting connecting to your database using MySQL Workbench, you'll have to first get the host name or the IP address of the Hostek MySQL server your database is on. | Before connecting connecting to your database using MySQL Workbench, you'll have to first get the host name or the IP address of the Hostek MySQL server your database is on. | ||
| + | === Windows === | ||
| − | + | #Login to your control panel | |
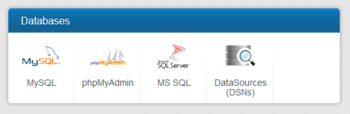
| + | #Under Databases, Click on MySQL. <br /> [[File:Mysqlicon.png|350px]] | ||
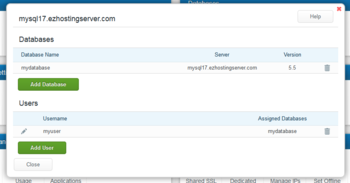
| + | #You can find the host next to the database name. <br /> [[File:Mysqlscreen.png|350px]] | ||
| − | + | === Linux === | |
| − | + | ||
| − | + | ||
| − | + | ||
| − | + | ||
| − | + | ||
| − | + | ||
| − | + | ||
| − | + | ||
| − | + | ||
You should be able to use your domain name as the host. However in order to connect externally to your database with programs such as MySQL workbench you'll need to enable remote MySQL access to your database. | You should be able to use your domain name as the host. However in order to connect externally to your database with programs such as MySQL workbench you'll need to enable remote MySQL access to your database. | ||
| + | Depending on your cPanel theme, the location and text may be different. The screenshots below are from the themes x3 and paper lantern. | ||
| − | Login to your cPanel | + | #Login to your cPanel |
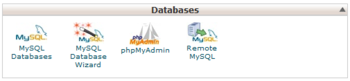
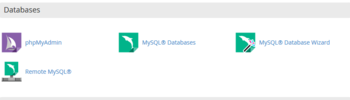
| + | #Under Databases go to Remote MySQL. <br /> [[File:Mysqlcpanelicon.png|350px|x3 Theme]] [[File:Mysqlcpanelicon_paper.png|350px|Paper Lantern Theme]] | ||
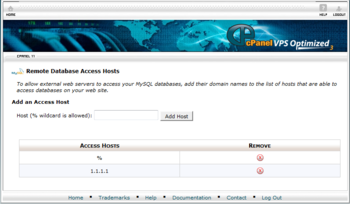
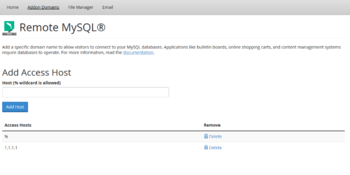
| + | #If you have a specific static IP you want to grant remote access to, you can enter it here and click on "Add Host". Otherwise you can grant remote access from any IP by entering % as the host and click on Add Host. <br /> [[File:Mysqlremoteaccess.png|350px|x3 Theme]] [[File:Mysqlremoteaccess_paper.png|350px|Paper Lantern Theme]] | ||
| − | + | === Configuring MySQL Workbench === | |
| − | + | # Open MySQL Workbench on your local machine | |
| + | # Click on the (+) icon <br /> [[File:Mysqlworkbench.png|350px]] | ||
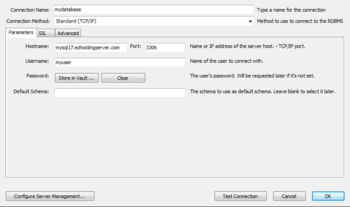
| + | # Fill in the connection details and you can optionally store your password in the vault. <br /> [[File:Mysqlworkbenchlogin.png|350px]] | ||
==How to use MySQL Workbench to backup your MySQL database== | ==How to use MySQL Workbench to backup your MySQL database== | ||
| − | |||
| − | |||
| − | |||
| − | |||
| − | |||
| − | |||
| − | |||
| − | |||
| − | |||
| − | |||
| − | |||
| − | + | [[File:Mysqlworkbenchexportmenu.png|350px]] [[File:Mysqlworkbenchdataexport.png|350px]] | |
| + | # Click on Server in the menu and then click on Data Export | ||
| + | # Click the box next to the Schema (also known as a database) that you are wanting to export. (Optionally, you can change the location where the file is going to be dumped) | ||
| + | # Press the 'Start Export' button | ||
| − | |||
| + | ==How to use MySQL Workbench to Restore your MySQL database== | ||
| − | + | [[File:mysqlworkbenchimportmenu.png|350px]] [[File:Mysqlworkbenchdataimport.png|350px]] | |
| + | # Click on Server in the menu and then click on Data Import <br /> | ||
| + | # Click on the button next to the "Import From Self-Contained File" textbox and select the MySQL dump file you want to import and select the target schema (also known as a database) or alternatively you can create a new schema. | ||
| + | # Press the 'Start Import' button | ||
| − | |||
| − | [[Category:Databases]] | + | [[Category:Databases-MySQL]] |
Latest revision as of 22:26, 16 March 2015
Contents
What is MySQL Workbench?
MySQL Workbench is a unified visual tool for database architects, developers, and DBAs. MySQL Workbench provides data modeling, SQL development, and comprehensive administration tools for server configuration, user administration, and much more. MySQL Workbench is available on Windows, Linux and Mac OS.
Where can I get MySQL Workbench?
You can obtain a copy of MySQL Workbench here: MySQL Workbench Download
How do I connect to my database using MySQL Workbench?
Before connecting connecting to your database using MySQL Workbench, you'll have to first get the host name or the IP address of the Hostek MySQL server your database is on.
Windows
- Login to your control panel
- Under Databases, Click on MySQL.
- You can find the host next to the database name.


Linux
You should be able to use your domain name as the host. However in order to connect externally to your database with programs such as MySQL workbench you'll need to enable remote MySQL access to your database.
Depending on your cPanel theme, the location and text may be different. The screenshots below are from the themes x3 and paper lantern.
- Login to your cPanel
- Under Databases go to Remote MySQL.
- If you have a specific static IP you want to grant remote access to, you can enter it here and click on "Add Host". Otherwise you can grant remote access from any IP by entering % as the host and click on Add Host.


Configuring MySQL Workbench
- Open MySQL Workbench on your local machine
- Click on the (+) icon

- Fill in the connection details and you can optionally store your password in the vault.


How to use MySQL Workbench to backup your MySQL database


- Click on Server in the menu and then click on Data Export
- Click the box next to the Schema (also known as a database) that you are wanting to export. (Optionally, you can change the location where the file is going to be dumped)
- Press the 'Start Export' button
How to use MySQL Workbench to Restore your MySQL database


- Click on Server in the menu and then click on Data Import
- Click on the button next to the "Import From Self-Contained File" textbox and select the MySQL dump file you want to import and select the target schema (also known as a database) or alternatively you can create a new schema.
- Press the 'Start Import' button