MyLittleAdmin / myLittleBackup
This wiki article will show how to login to your myLittleAdmin or myLittleBackup via your WCP control panel.
Contents
What is myLittleAdmin / myLittleBackup?
myLittleAdmin - The myLittleAdmin feature is an application that allows you to login to your database and view and manage your MS SQL database. You can run queries via your database(s) as well as view, create, update, and delete table information for your database.
This is an alternative option for those that don't want to use SQL Server Management Studio.. which is the main tool used for managing Microsoft SQL databases.
myLittleBackup - The myLittleBackup feature is an application that allows you to backup and / or restore your database. If you are moving your database from one host machine to another (such as from another hosting provider) then you can use this tool to upload your backup file and restore the database on our servers.
Note: These two tools are only an option for those on our shared platforms.. as these tools are licensed for the use for our shared MS SQL servers. For dedicated (VPS) customers please connect to your database(s) via SQL Server Management Studio directly on your local computer or directly on the desktop of your server via RDP.
- First login to your WCP control panel for the account the domain is under: https://wcp.hostek.com

If you have any issues with logging into WCP then please see our tutorials on recovering your password if necessary
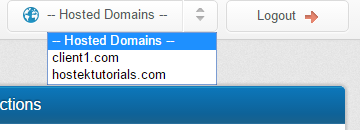
- Once logged into WCP if you have multiple domains you may need to select the appropriate domain to manage using the 'Hosted Domains' drop-down in the top-right of the page as shown in the screenshot below:
- Now click on the icon labeled 'MS SQL Tools' under the Databases section
- You should now see a list of available database users you can login to for each database and it's associated server. Click on the 'Login' button next to either myLittleAdmin or myLittleBackup.. depending on which tool you're wanting to access.


Backing up Database (myLittleBackup)
In the above section we covered how to login to myLittleBackup.. let's now show how to backup the database.
- In the menu on the left-navigation panel click on the 'Backup Database' option as shown in the screenshot below:
- Now click the drop-down and select the database you want to backup as shown in the screenshot below:
- Next click on 'OK', then click on 'Backup' as shown in the screenshot below:
- Now you should see a message stating the backup was successful and link to download the backup. Click the link and the file will download to the location your browser has set as the default downloads folder on your computer


Restoring Database (myLittlebackup)
In the above section we covered how to login to myLittlebackup.. let's now show how to restore a database.
- In the menu on the left-navigation menu click on the 'Restore Database' option as shown in the below screenshot:
- Now click on the drop-down and select the database you wish to restore to as shown in the screenshot below:
- Click on the 'OK' button. A new field will appear asking you to select the backup file (or upload one) to use to restore the database from. Click 'Choose File' and select your database backup file and then click 'OK' again to start the upload.
- Now you should see the file you uploaded in the list of available files to choose from. Click on the file you wish to select and then click on 'OK' to use that file.
- Now click on the 'Restore' button as shown in the screenshot below:
- You will receive a prompt in your browser asking if you're sure that you want to restore / overwrite your existing database with the file you selected. Click 'OK' to proceed and 'Cancel' to cancel.


Post Restore Common Issue
It is known that when restoring an MS SQL database that this can cause the database owner (DBO) to become lost and needing to be set back to the actual database user. If you find that your database becomes inaccessible or has permissions issues after this restore please set the Database Owner (DBO) back to the user it should be assigned to. You can see the wiki article on managing your database settings if needed.