Manage MS SQL Databases
In this tutorial we will show how to create and manage MSSQL Databases and their respective users in WCP.
Contents
First login to your WCP control panel for the account the domain is under: https://wcp.hostek.com

If you have any issues with logging into WCP then please see our tutorials on recovering your password if necessary
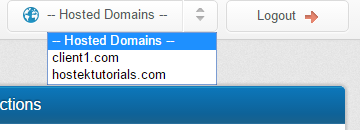
Once logged into WCP if you have multiple domains you may need to select the appropriate domain to manage using the 'Hosted Domains' drop-down in the top-right of the page as shown in the screenshot below:
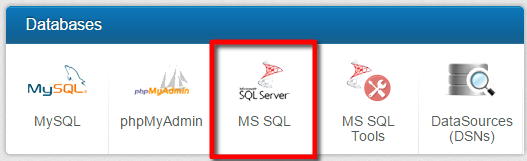
In your control panel click on the 'MS SQL' icon under the 'Databases' section.

Add MS SQL Database
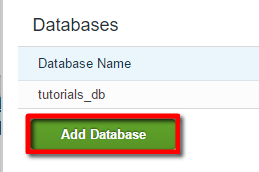
- If you don't have any existing databases then skip to step 3, as you'll automatically be on the new database screen. If you do already have existing database(s) then you should see them listed here, along with the server they reside on. Click on the 'Add Database' button to create a new database.
You will now be asked for the below database information to be created:
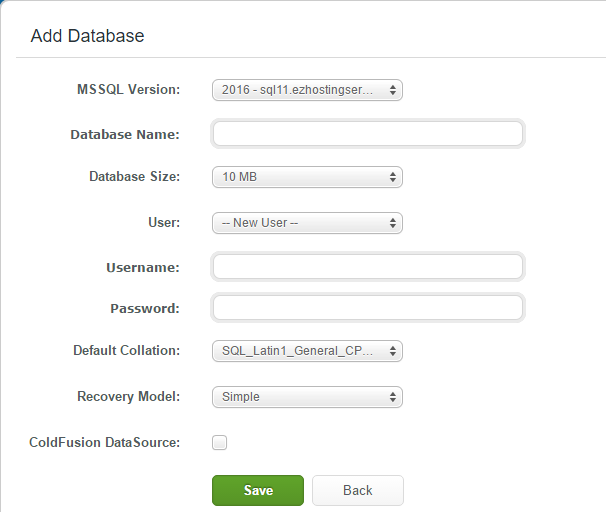
MSSQL Version: This MSSQL Version field will show the server that your MS SQL database will be created on, along with the version of MS SQL that the server is using.
Database Name: Enter the desired database name that you wish to create.
User: This User drop-down allows you to select an already existing user if you have a MS SQL user that is already on the server that your new database is being created on. If you do not have a pre-existing user or you don't wish to use a pre-existing user then you'll need to fill in the username and password fields.
Note: If you do select a pre-existing user then the 'username' and 'password' fields will disappear.
Username: Enter the username you wish to create that you'll use to login to the MS SQL database.
Password: Enter the password for the new MS SQL user that you are creating. You'll use this password to login to the MS SQL database user.
Default Collation: In the 'Default Collation' drop-down menu, select the default collation for this database. Our default collation is usually sufficient, and you likely won't need to change it. If you're unsure, you'll need to consult with your application developer.
Recovery Model: A recovery model is a database property that controls how transactions are logged, whether the transaction log requires (and allows) backing up, and what kinds of restore operations are available. In the Recovery Model drop-down menu, you can set your recovery model to either 'Full' or 'Simple'. We recommend keeping this as 'Simple' to prevent large log files that can cause the database to fill up. We have backups on our shared servers for MS SQL if needed so setting to 'Simple' would be our recommendation.
ColdFusion DataSource: This checkbox option is only visible if your site resides on a ColdFusion server. Selecting the checkbox will automatically create a data source (DSN) within ColdFusion Admin with the configuration details of the database you're creating. After selecting the checkbox a field will appear which you can enter the name of the data source that you'll call within your sites application (code).
Double check the values you have entered, then click the 'Save' button to add this MSSQL database.


Update MS SQL Database Settings
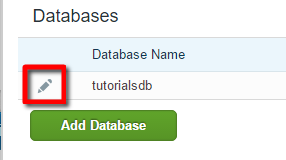
If you have databases on multiple database servers, you may need to click on the pencil icon next to the related MS SQL database server (you should see a list of databases on each database server in order to differentiate). Now to update an existing MS SQL database click on the pencil icon next to the MS SQL database that you would like to manage.
You should now have the option to update the following:
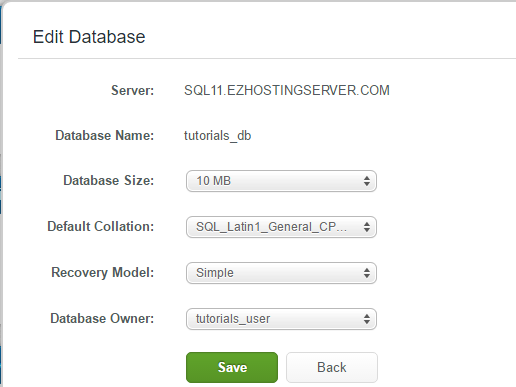
Database Size: Use this drop-down to change your database's maximum size.
Default Collation: Use this drop-down to change your databases default collation for tables. A collation is a set of rules for comparing characters in a character set. The application developer for the site should know which collation is needed, which if not the pre-set default collation of SQLLatin1_General_CP1_CI_AS_ would probably be best.
Recovery Model: Use this drop-down to change the way transaction logs are stored for the database. Keep in mind that setting this option to 'Full' can cause the transaction logs for the database to become full which would result in the database being non-functional until the logs were shrunk or more space was allocated to the database.
Note: Please also note that we keep backups for databases already for shared servers. Depending on the add-ons you have selected for backups we may have database backups for VPS servers as well.
Database Owner (DBO): Use this drop-down to change which user is the owner of the database. The database owner has special permissions, which commonly is needed for any updates to the database via a sites application or even by logging into the database with tools such as SQL Server Management Studio.
Note: If you login successfully to an application but cannot see the database then it's usually a sign that the user you're connected with is not set as the DBO.
Double check the values you have selected, then click the 'Save' button to finish modifying this MS SQL database.


Add an MSSQL User
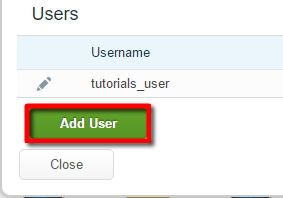
Click on the 'Add User' button to create a new user.
Note: If you have databases on multiple database servers, you may need to click on the pencil icon next to the related MS SQL database server first (you should see a list of databases on each database server in order to differentiate).
You should now see the below requested fields for the new MS SQL user:

Username: Enter the name of the new MS SQL user you would like to add.
Password: Enter the password for the new MS SQL user you would like to add.
Permissions: The 'Permissions' section allows you to choose which databases the MS SQL user has access to. Select the checkbox for each database this user should have basic permissions to.
Note: The user does not automatically get assigned as DBO, which most task in MS SQL requires the user to be set as, so you'll have to follow the instructions in the above section 'Update MS SQL Database Settings'.
Double check the values you have entered, then click the 'Save' button to add this MySQL database user and it's respective permissions.


Updating MSSQL User Password & Permissions
Click on the pencil icon next to the user.

Note: If you have databases on multiple database servers, you may need to click on the pencil icon next to the related MS SQL database server first (you should see a list of databases on each database server in order to differentiate).
Now you will be able to update the MS SQL users password and / or permissions.
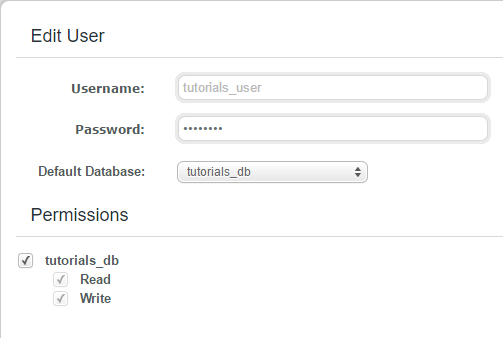
To update your password enter in the newly desired password into the 'Password' field. Passwords must:
- Be at least 6 characters long
- Have a lowercase letter
- Have a uppercase letter
- Have a number
- Have a symbol
You may update this user's default database by selecting the new default database in the drop-down menu next to 'Default Database'.
The permissions section allows you to select the checkbox next to each database you wan the user to have basic permissions to. Please note that most MS SQL database functions and applications require that the user be set as the DBO, which you'll have to do through the above section for Updating Database Settings.
Double check the values you have entered, then click the 'Save' button.

