Create and manage domain aliases in WCP
In this wiki, you’ll learn how to create and manage domain aliases in WCP. A domain alias is a way to mirror your website’s content. Many customers use this feature to use multiple tld versions of their domain e.g. example.com and example.net.
Add a Domain Alias
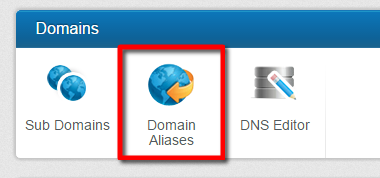
In the ‘Domains’ section, click the ‘Domain Aliases’ icon.
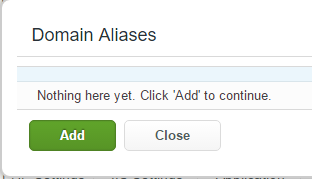
You should now see a list of your existing domain alises ( if any ). Click the ‘Add’ button to add a new domain alias.
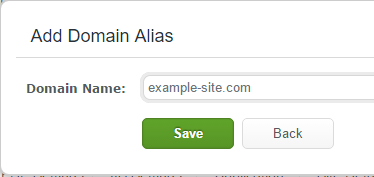
Now enter the desired domain alias in the ‘Domain Name’ field. Double check that the domain is spelled correctly, then click ‘Save’.
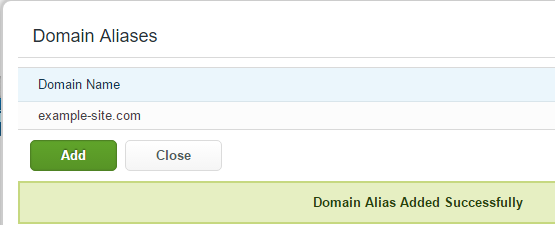
The domain alias should now be successfully added and you should see it listed in your list of existing domain aliases.
Note: A domain alias will only work if you point the domain you’re trying to alias to the server you’re setting the domain alias on.
In order for the domain alias to resolve properly to the same server as the main ( original ) domain the domain alias must have it's DNS pointing to the server the domain alias is set on.
You have two options for updating the domain alias to point to the server, which we'll go over below and then also show how to obtain the info for each:
A) Update the name servers for the domain to point to the pair of name servers the hosting package you have is assigned.
B) Update the A Record for the site to point to the IP Address of the server.
If updating the A Record for the domain alias then we recommend updating the record for www and non-www so both point to the server.
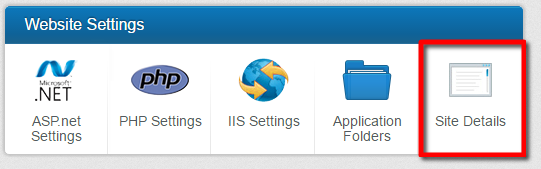
To get the IP Address and / or name servers that the domain alias needs to be updated to click the 'Site Details' icon in your WCP control panel.
The Name Servers and IP Address information can be found next to their respective sections in this 'Site Details' pane as shown below:
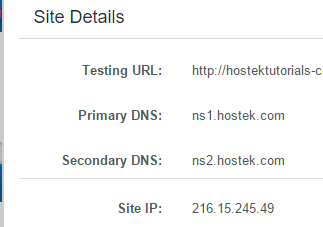
Primary DNS - The primary name server you'll update your domain to point to at the domain registrar for your domain.
Secondary DNS - The secondary name server you'll update your domain to point to at the domain registrar for your domain.
Site IP - The IP Address you'll update the A Record for if you're updating the records themselves.
Note: If updating the DNS please allow a couple hours for propagation for the DNS change to complete across all systems around the world.


Remove a Domain Alias
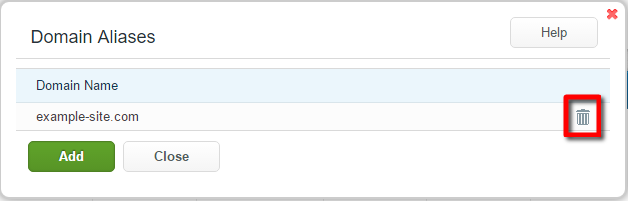
In the 'Domains' section, click the 'Domain Aliases' icon.
Click on the trash can icon next to the domain alias you would like to delete.
 caption image
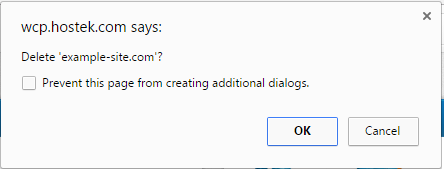
You'll now be prompted with a popup asking if you really want to delete the selected domain alias. Double check that the domain alias is the one you would like to remove, then click 'OK'.
If selected 'OK' then the domain alias should be successfully removed.

