Billing - Account
Contents
Register
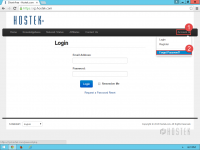
Before you can manage your account, you must first register as a new customer. When ordering new services, you will be prompted to either register a new account or sign into an existing account before checkout. Therefore, you have likely already completed this process. However, should you need to register a new account beforehand, please follow the instructions below.
Direct link:
https://cp.hostek.com/register.php
To register a new account:
- Open a new browser window or tab
- Navigate to https://cp.hostek.com
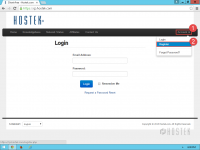
- Click on the Account link on the right of the navigation menu at top
- Select Register from the dropdown menu that appears
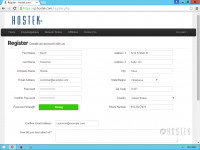
- Fill in the requested information
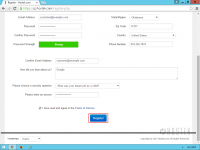
- Click the Register button
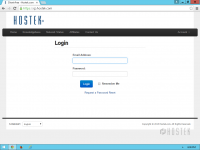
Login
Before managing your account or services, you must first login to your account. If you are not yet an existing customer you will first need to Register a New Account. To login to your account, please follow the instructions below.
Direct link:
https://cp.hostek.com/clientarea.php
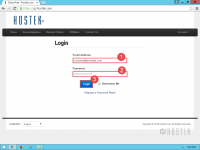
To login to your account:
- Open a new browser window or tab
- Navigate to https://cp.hostek.com
- Fill in the requested information
- Click the Login button
Alternative Method:
- Open a new browser window or tab
- Navigate to https://cp.hostek.com
- Click on the Account link on the right of the navigation menu at top
- Select Login from the dropdown menu that appears
Reset Password
If you have misplaced or otherwise forgotten, your password, you can easily reset your password to restore access to your account. To reset your password, please follow the instructions below:
Direct link:
https://cp.hostek.com/pwreset.php
To reset your password:
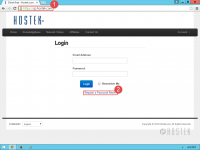
- Open a new browser window or tab
- Navigate to https://cp.hostek.com
- Click on the Request a Password Reset at the bottom of the login form
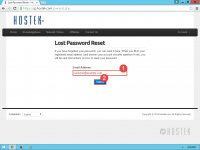
- Enter your email address into the Lost Password Reset form
- Click the Submit button
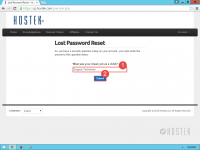
- If prompted, input the answer to your account's security question and click the Submit button
Alternative Method:
- Open a new browser window or tab
- Navigate to https://cp.hostek.com
- Click on the Account link on the right of the navigation menu at top
- Select Register from the dropdown menu that appears
- Enter your email address into the Lost Password Reset form
- Click the Submit button
If you created a security question, you will be prompted to enter the answer to this security question prior to resetting the password. Please note that the answer to this security question is case-sensitive (capitalization is important) and must be entered exactly as it was when created. If you are unable to remember the answer to your security question, please contact support for assistance.
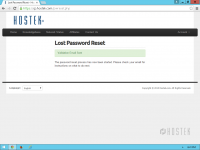
A password reset confirmation will be sent to your email address within 5-10 minutes. If you did not receive the message, please check your spam or junk mail folder before requesting another reset and contact support if the problem persists.
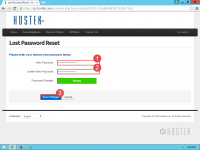
To complete the process:
- Click the password reset link to continue in the email message
- Enter your new password
- Confirm your new password by typing it again
- Click the Save Changes button
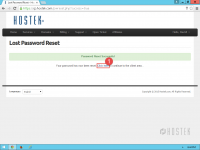
Your password is now reset, and you may continue to your account overview by clicking the link below the Password Reset Successful confirmation message.
Edit Account Details
Keeping your account up-to-date is important to ensure that your services are unnecessarily interrupted. You can view or edit your name, contact information, default payment method and more from the Account Details page of the client area.
Direct link:
https://cp.hostek.com/clientarea.php?action=details
To view/edit your account details:
- Login to the client area
- Click on the Hello, [Name]! link on the right of the navigation menu at top
- Select Edit Account Details from the dropdown menu that appears
- If necessary, click the My Details tab from the tab menu at top
- Fill in the requested information
- Click the Save Changes button at the bottom of the page
Alternative Method:
- Login to the client area
- Click the Update Your Details link from the top of your dashboard
- If necessary, click the My Details tab from the tab menu at top
- Fill in the requested information
- Click the Save Changes button at the bottom of the page
Manage Credit Card
Keeping your credit card details up-to-date is important to ensure that your services are unnecessarily interrupted. You can can view or edit your credit card information from the Credit Card Details page of the client area.
To view/edit your credit card details:
- Login to the client area
- Click on the Hello, [Name]! link on the right of the navigation menu at top
- Select Manage Credit Card from the dropdown menu that appears
- If necessary, click the Credit Card Details tab from the tab menu at top
- Fill in the requested information
- Click the Save Changes button at the bottom of the page
Alternative Method:
- Login to the client area
- Click the Update Your Details link from the top of your dashboard
- If necessary, click the Credit Card Details tab from the tab menu at top
- Fill in the requested information
- Click the Save Changes button at the bottom of the page
Contacts/Sub-Accounts
Should you want to permit others access to certain aspects of your account or to act on your behalf, you can create contacts or sub-accounts. This is useful, for instance, if you have developers that may need to interact with our support department.
Note: If a person contacts on your behalf and is not listed as a contact or sub-account associated with your account, we cannot disclose sensitive information pertaining to your account.
Contacts are people to whom you have granted privileges to act on your behalf. Unless you share your login credentials for the client area—which is strongly discouraged—contacts do not have access to your billing control panel.
Sub-accounts serve the same purpose as contacts, but are assigned their own login username and password. This permits them to login to the client area with limited access to act on your behalf. At the time a sub-account is created, you will be given the opportunity to define what areas of the client area the user has access to.
Direct link:
https://cp.hostek.com/clientarea.php?action=contacts
To manage contact and sub-accounts:
- Login to the client area
- Click on the Hello, [Name]! link on the right of the navigation menu at top
- Select Contacts/Sub-Accounts from the dropdown menu that appears
- If necessary, click the Contact/Sub-Accounts tab from the tab menu at top
- If editing an existing contact, select the contact's name from the pull-down menu at top
- Fill in the requested information
- Click the Save Changes button at the bottom of the page
Alternative Method:
- Login to the client area
- Click the Update Your Details link from the top of your dashboard
- If necessary, click the Contacts/Sub-Accounts tab from the tab menu at top
- If editing an existing contact, select the contact's name from the pull-down menu at top
- Fill in the requested information
- Click the Save Changes button at the bottom of the page
Email History
For your convenience, a list of all messages dispatched by the client area to you are archived for later review within the billing control panel. To review these messages, follow the instructions below.
Direct link:
https://cp.hostek.com/clientarea.php?action=emails
To review client area messages:
- Login to the client area
- Click on the Hello, [Name]! link on the right of the navigation menu at top
- Select Email History from the dropdown menu that appears
- Click the View Message button to the right of the message you want to review
Depending on the number of messages that have been sent to your account, there may be several pages of results. You can use the ← Prev Page and Next Page → buttons to view the entire list. To make it easier to find a specific message, you can also click the Date Sent and Message Subject table headers to sort by ascending or descending order.
Change Password
Note: If you believe that your account information has been accessed without your permission or your account has been compromised in any way, please contact support immediately.
For the sake of account security, we recommend periodically changing your client area password. This can be done by following the instructions below.
To change your client area password:
- Login to the client area
- Click on the Hello, [Name]! link on the right of the navigation menu at top
- Select Change Password from the dropdown menu that appears
- If necessary, click the Change Password tab from the tab menu at top
- Enter your existing password into the field provided
- Enter your new password as requested
- To confirm your new password, retype it in the field provided
- Click the Save Changes button
Alternate Method:
- Login to the client area
- Click the Update Your Details link from the top of your dashboard
- If necessary, click the Change Password tab from the tab menu at top
- Enter your existing password into the field provided
- Enter your new password as requested
- To confirm your new password, retype it in the field provided
- Click the Save Changes button
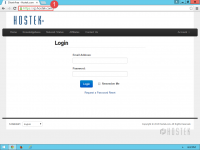
Once your password has been successfully changed, you will be automatically logged out and redirected to the login page where you will need to enter your new account information to access the client area. An email will then be dispatched to the email address on file to confirm the change. This prevents unauthorized changes to your account without your knowledge.
