Android - Email setup on Android
From Hostek.com Wiki
Revision as of 23:06, 4 June 2013 by Corym (Talk | contribs) (→Android 4.03 (Ice Cream Sandwich) Email Setup)
Contents
Android 4.03 (Ice Cream Sandwich) Email Setup
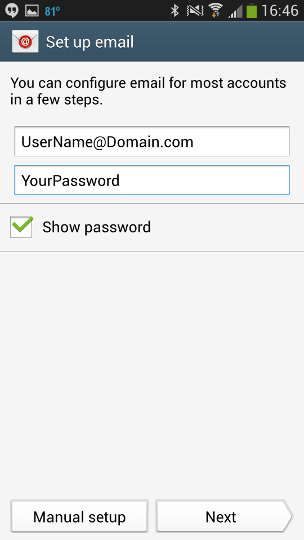
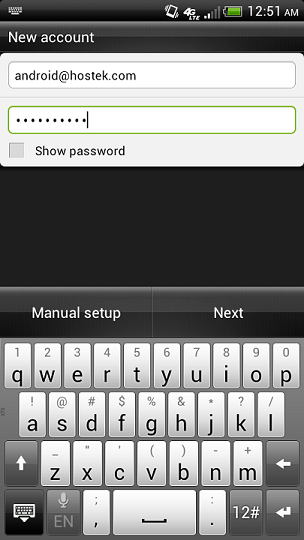
- Enter your Username and Password
- For this example we are going to use Name@Domain.com please replace them with your Username and Password
- Select "Manual Setup"
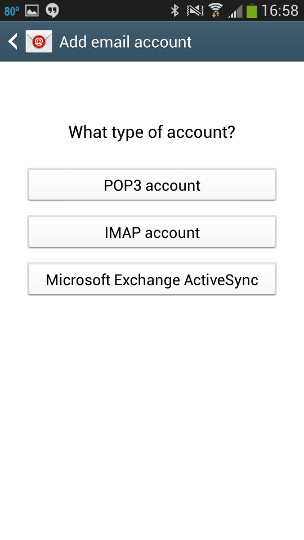
- Select "IMAP Account"
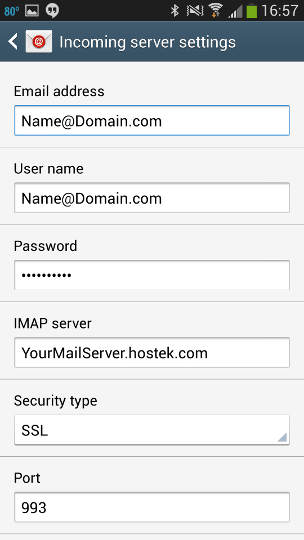
- Verify that your settings are correct
- By default Android will not include your domain to the Username field. You will have to add this.
- In the "IMAP Server" box Replace YourMailServer with the mail server that your domain uses You can find out which mail server you are on from "Web Mail" in WCP
- Change Security Type to "SSL"
- Leave the IMAP prifix blank and Select "Next"
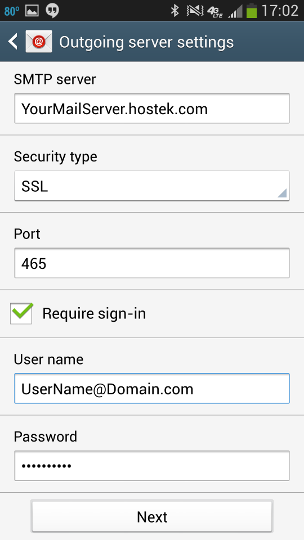
- Verify that your settings are correct
- In the "SMTP Server" box Replace YourMailServer with the mail server that your domain uses
- Change Security Type to "SSL"
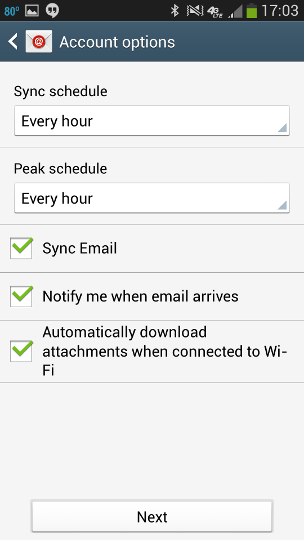
- Set your Sync Options
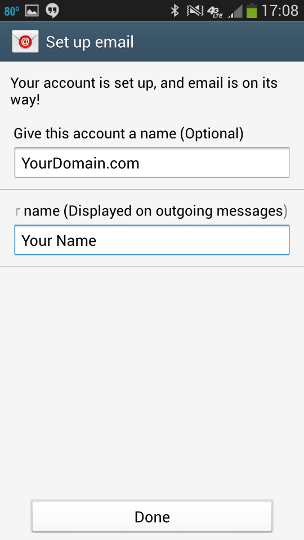
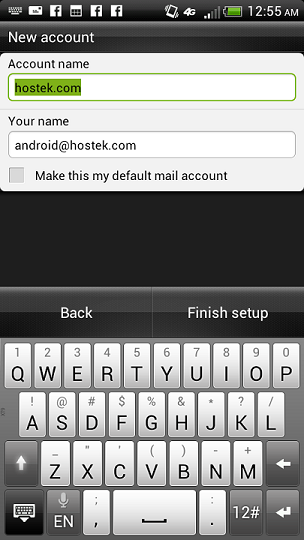
- Name your Account and set your Display Name
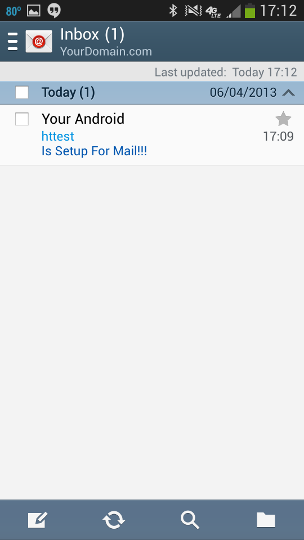
- Congratulations! Your Hostek.com E-mail is now set up on your Android device!
Android 4.03 (Ice Cream Sandwich) Email Setup
- Choose Applications > Mail > New Account
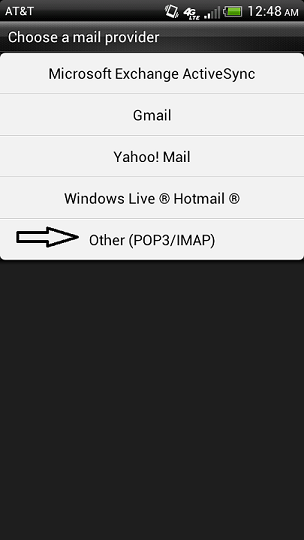
- Select Other (POP3/IMAP)
- Fill in the EMail Address and Password and hit Next
- Verify the settings for Incoming Mail are correct.
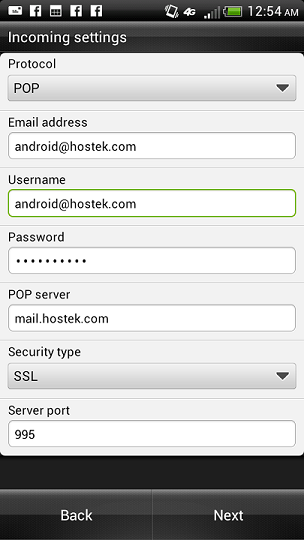
Note: Username is the full email address and SSL is checked. Replace 'hostek.com' in the POP Server to your domain name. If this gives you any issues you can also use the mail server your domain is on such as mail13.hostek.com.
- Verify Outgoing Server Settings are correct. When they are select Next
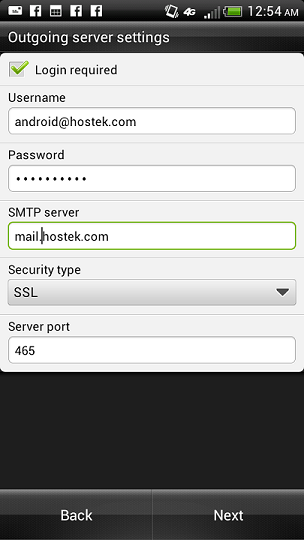
Note: Login Required is Checked. Username is the full email address and SSL is checked. Replace 'hostek.com' in the SMTP Server to your domain name. If this gives you any issues you can also use the mail server your domain is on such as mail13.hostek.com. When they are select Next.
- Name your account what you would like and put your name if you like and click Finish Setup.
