Difference between revisions of "Client Area - Two Factor Authentication"
(Created page with "We are going to show you how to enable two-factor authentication for your billing control panel ( client area ) and how it works. 1. Let's start by browsing to the location...") |
|||
| Line 57: | Line 57: | ||
:: <b>Note:</b> As you can see in the screenshot above there is the option for ‘<b>Login using Backup Code</b>’, which is why it’s important to save the ‘<b>Backup Code</b>’ in the case your device is ever not available to retrieve the two-factor authentication code. | :: <b>Note:</b> As you can see in the screenshot above there is the option for ‘<b>Login using Backup Code</b>’, which is why it’s important to save the ‘<b>Backup Code</b>’ in the case your device is ever not available to retrieve the two-factor authentication code. | ||
| + | |||
| + | |||
| + | 12. Additionally FYI, if you have any windows hosting packages that utilize our custom built WCP control panel then this will automatically enable the two-factor authentication code requirement for the use of WCP logins. So when trying to login to WCP ( https://wcp.hostek.com ) you will also have to enter the 6-digit two-factor authentication code there in order to login. | ||
| + | |||
| + | :: [[File:two_factor_auth_wcp.png]] | ||
Revision as of 22:03, 17 October 2016
We are going to show you how to enable two-factor authentication for your billing control panel ( client area ) and how it works.
1. Let's start by browsing to the location of the billing control panel: https://cp.hostek.com/
2. Now fill out the email address and password you used when you signed up for hostek.com. You should have received an email when you signed up from Hostek.com with the subject 'Welcome'. That message should contain the email address and password you used when you initially set up the account.
- Note: If you changed your password after receiving this email, then you’ll need to use the newly created password or request a password reset.
3. Click the 'Login' button once you've entered the correct email address and password. You should now be successfully logged into your billing control panel.
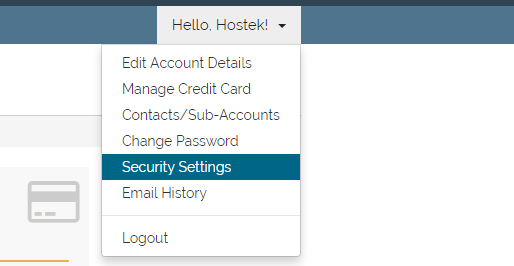
4. Now click on the drop-down in the top-right navigation menu labeled ‘Hello, Name’ and select the option for ‘Security Settings’.
- Note: The account owners first name will take the place of 'Name'.
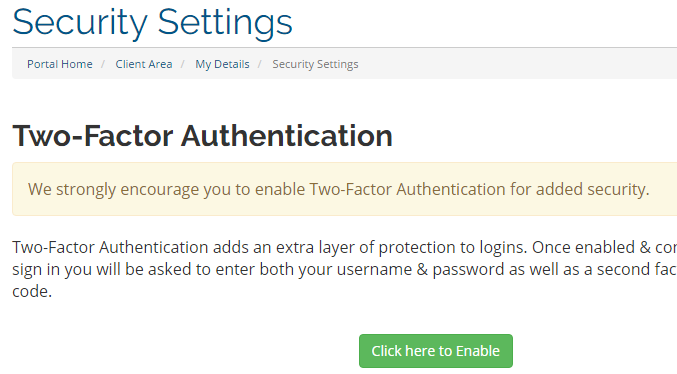
5. You should now have the option under ‘Two-Factor Authentication’ to enable this feature. Click the ‘Click here to Enable’ button to enable two-factory authentication.
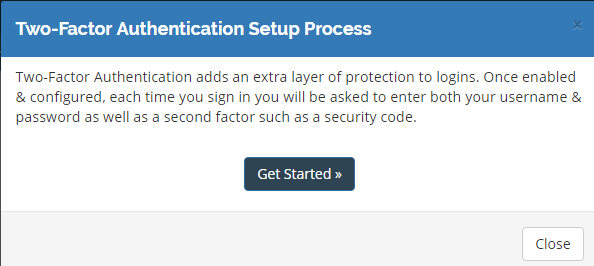
6. You should now receive a prompt letting you know that Two-Factor authentication adds an extra layer of protection to logins. Click the ‘Get Started’ button to continue.
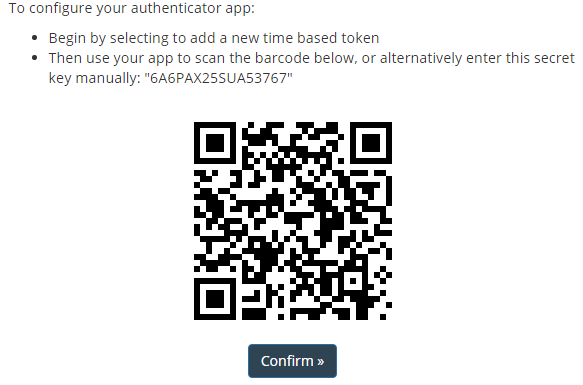
7. You should now see in the next prompt a message stating how you can configure your two-factor authentication. We recommend using an app called ‘Google Authenticator’ for this usage, as it is available for iOS, Android, and Windows mobile devices.
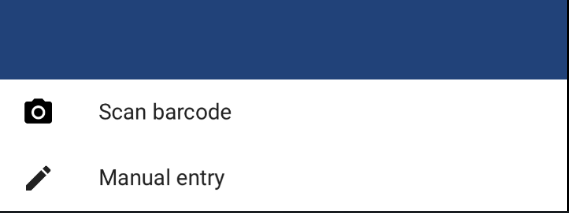
8. In your Google Authenticator app, or whichever app you prefer, use this barcode or key to add Hostek.com to your two-factor authentication list. Once done click ‘Confirm’ in your billing control panel under the barcode.
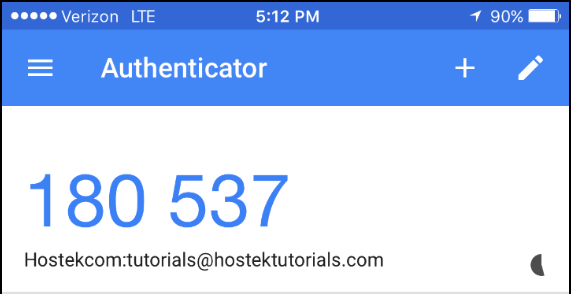
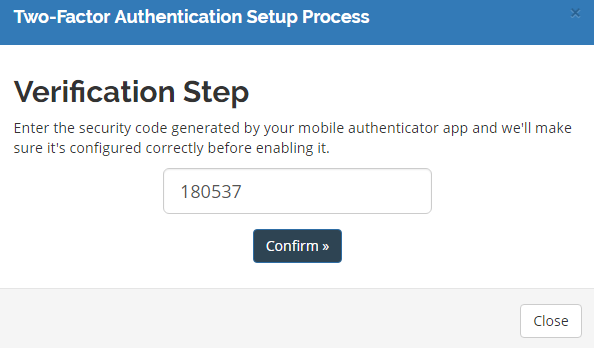
9. Now that you have added Hostek.com to your two-factor authentication list in your app you should see a six digit code that you can use to verify your authentication. This code refreshes every 30 seconds so you have to enter this code in the verification field on the billing control panel before the next refresh or your code will be invalid. Once the code refreshes the new code will become valid for use instead. So, now in your authentication app find the six digit code and enter that into the field in the billing control panel prompt and click ‘Confirm’ as shown in the screenshots below:
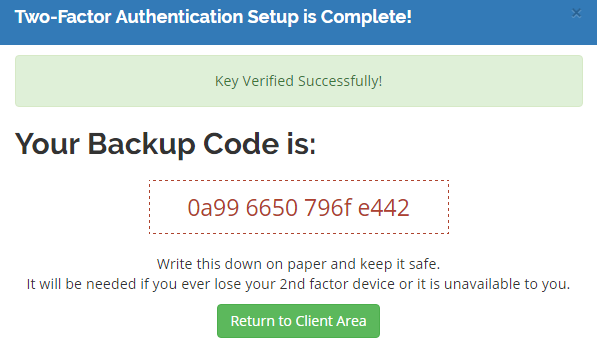
10. Now you should see in the next prompt that your key was verified successfully. You will also see your ‘Backup Code’ in this prompt which you should keep written down somewhere safe… in the case that you ever lose your device that you have the two-factor authentication code on, or the device is unavailable to you at the present time.
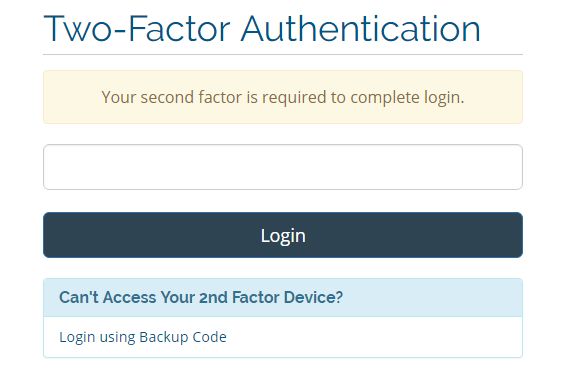
11. Now that you have two-factor authentication turned on anytime you try logging into your billing control panel you will be prompted for the password and your two-factor authentication code which you can get from the device that you enabled the two-factor authentication on.
- Note: As you can see in the screenshot above there is the option for ‘Login using Backup Code’, which is why it’s important to save the ‘Backup Code’ in the case your device is ever not available to retrieve the two-factor authentication code.
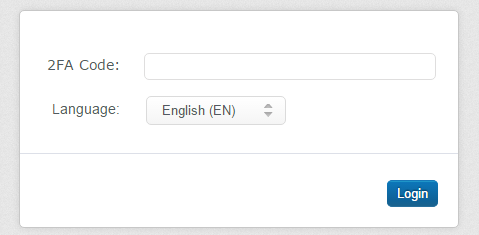
12. Additionally FYI, if you have any windows hosting packages that utilize our custom built WCP control panel then this will automatically enable the two-factor authentication code requirement for the use of WCP logins. So when trying to login to WCP ( https://wcp.hostek.com ) you will also have to enter the 6-digit two-factor authentication code there in order to login.


