Difference between revisions of "Kindle Fire Email Setup"
From Hostek.com Wiki
(→Open Mail Application) |
(→Provider & Setup Type) |
||
| Line 16: | Line 16: | ||
[[FILE:1_OpenMail400.png]] | [[FILE:1_OpenMail400.png]] | ||
| − | ===Provider | + | ===Select the Email Provider=== |
On the next screen, select <b>Other Provider</b> for the email account. If this is the first email account being setup, you will see the screen below. If there is already an account on the Kindle Fire, click Add Account. | On the next screen, select <b>Other Provider</b> for the email account. If this is the first email account being setup, you will see the screen below. If there is already an account on the Kindle Fire, click Add Account. | ||
[[FILE:2_OtherProvide400.png]] | [[FILE:2_OtherProvide400.png]] | ||
Revision as of 15:33, 12 June 2013
Contents
Prerequisites
- These are setup instructions for the 2nd Generation of the Kindle Fire.
- To setup up an email account, the Kindle Fire needs an internet connection.
- An active Mail account with Hostek.com (cPanel or SmarterMail)
- Username and Password
Setup
Open Mail Application on your Kindle Fire
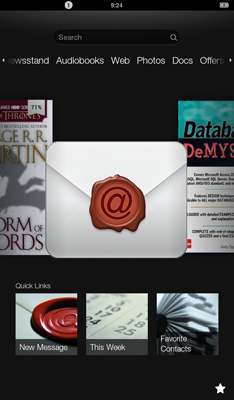
First, open the email application on your Kindle Fire. Find the envelope on your Kindle Fire "Carousel" and open the application.
Select the Email Provider
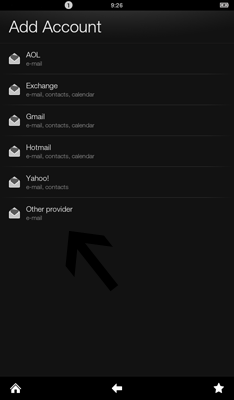
On the next screen, select Other Provider for the email account. If this is the first email account being setup, you will see the screen below. If there is already an account on the Kindle Fire, click Add Account.

