Domain Auto Renew
From Hostek.com Wiki
Manage Domain Auto Renew
In this tutorial we will show how to manage the domains 'Auto Renew' feature within your billing control panel.
Login to your account at https://cp.hostek.com
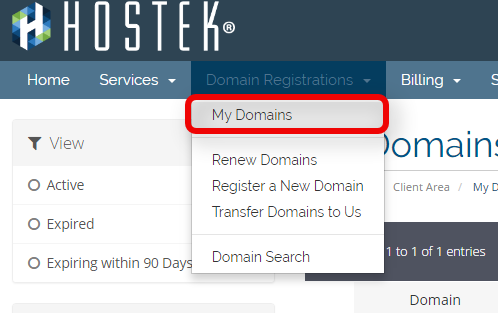
- In the top-navigation menu click on 'Domain Registrations', then click on 'My Domains'.
- You should now see a list of your active, cancelled, and expired domains that you've had in your account as shown in the screenshot below:
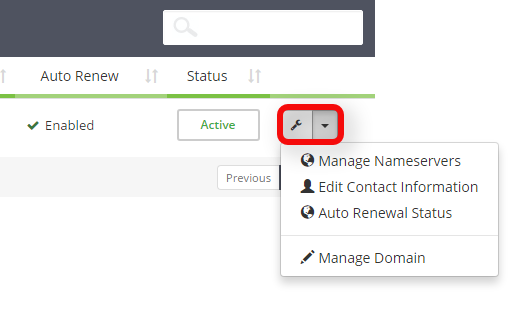
- To the right of the domain you wish to manage click the wrench icon, or select the drop-down and choose 'Manage Domain'.
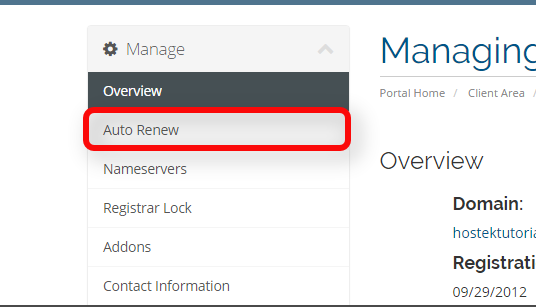
- You will now be in the management portal for the domain in question. You will see a menu bar on the left side of the page with all the available options to manage for a domain. Please select the menu option for 'Auto Renew'.
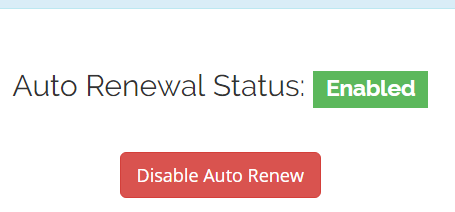
- YOu will now see the current status of the domains auto-renew feature. We default all domains to have auto-renew turned on, however you can click on the red button labeled 'Disable Auto Renew' if desired as shown in the screenshot below.
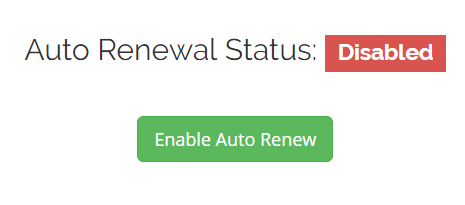
- If you ever set this feature to 'Disabled' then you can re-enable auto renew by following the same above steps and click the green button labeled 'Enable Auto Renew'.
Note: You can also click on 'Auto Renewal Status' if desired. If you do so skip to step 6.
Note: You can also see details about the domain including the registration date, future due date (expiration date), the status of the domain, and the annual fee for the domain each year.
